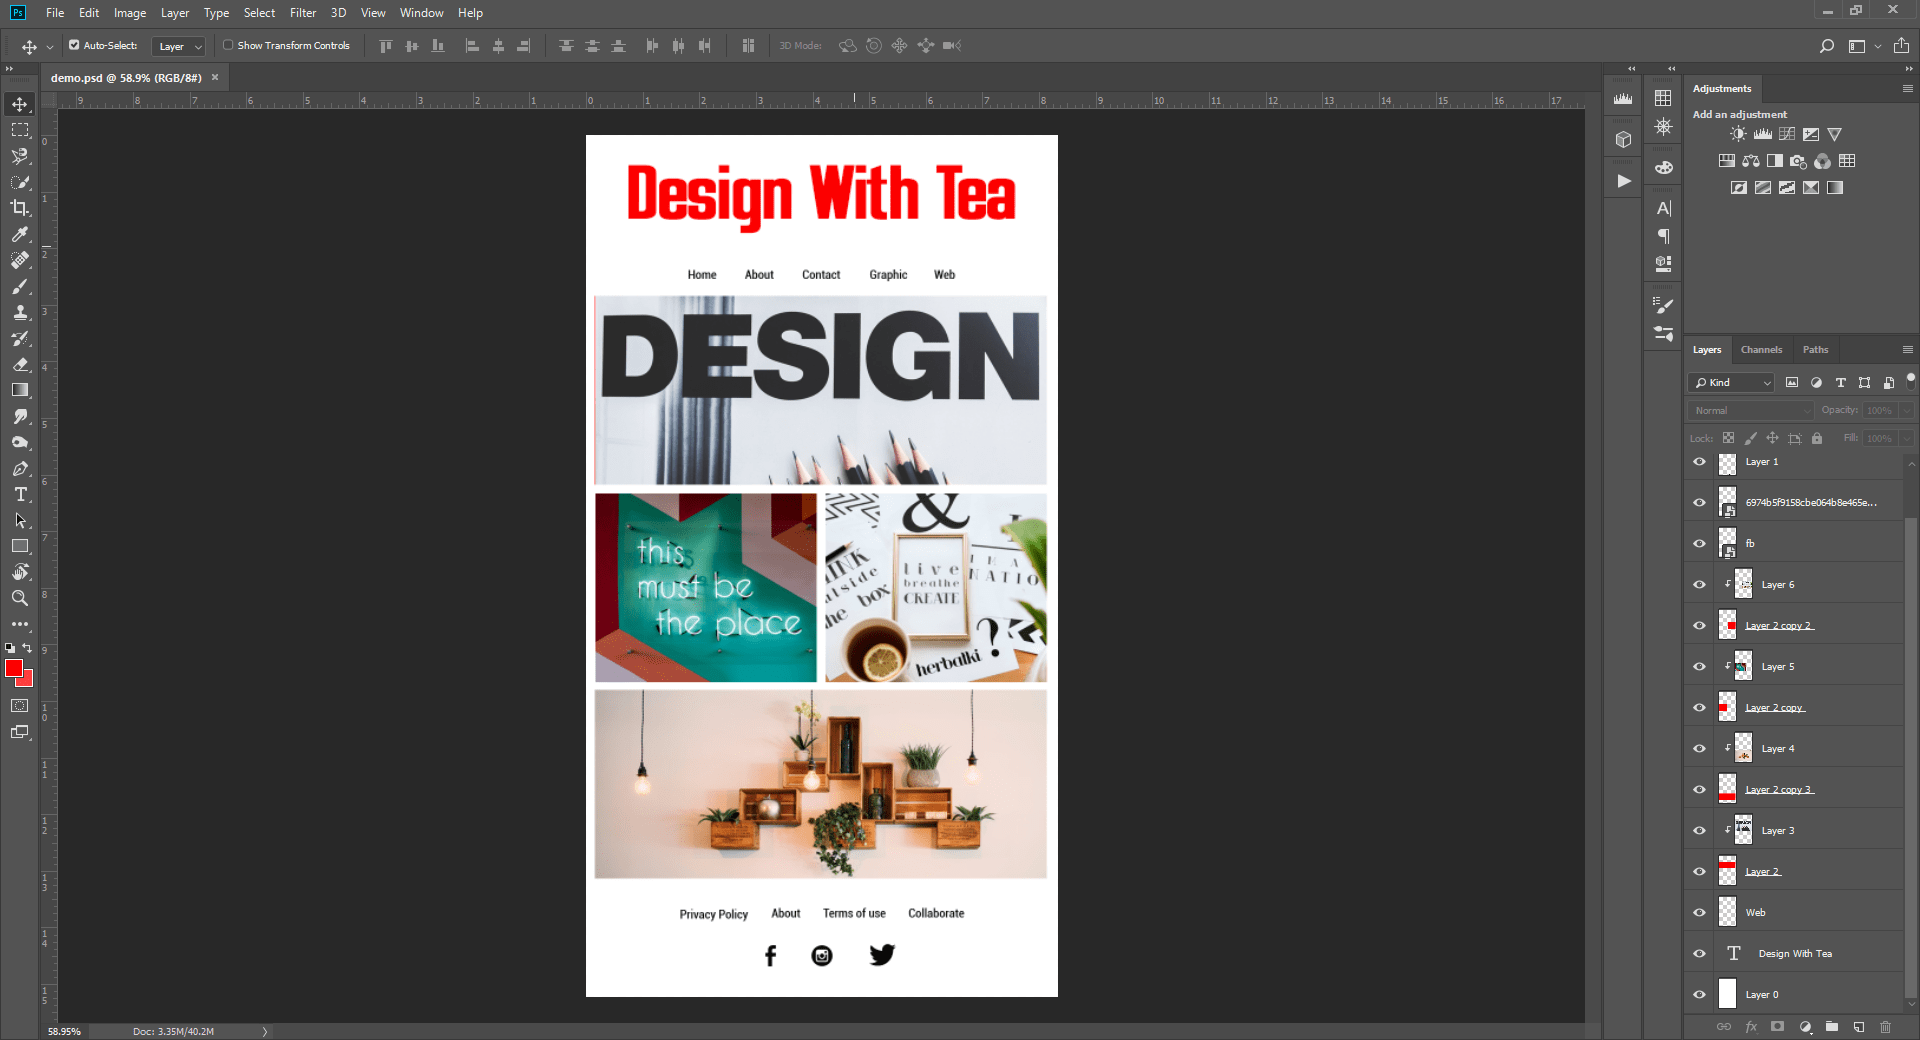
If you are a business owner or a graphic designer, you have probably heard about HTML newsletter. A newsletter is a tool that lets you communicate visually with your customers via email. There are other types of newsletters for sure & I am talking about Html Newsletters here specifically. Now if you are wondering How to design and code a Newsletter in photoshop without any coding knowledge.
Before we start designing a newsletter right away there are some things you need to know about a newsletter
Table of Contents
What is a newsletter?
A newsletter is a tool that can be used to talk to your customers about new products, blogs or updates on your website. It can also be used to communicate a summary of your weekly or monthly updates. For that, you have to design and code a newsletter though.
How to send a newsletter in Gmail free?
For sending a newsletter in Gmail for free you’ll need 2 things. One is a newsletter design in HTML format and second is a mail chimp account that lets you send the newsletter to your customers.
This is a step by step guide on, how to design and code an Html newsletter in photoshop without any coding knowledge.
Step-1: Basics of a newsletter.
Before jumping on designing on a newsletter, you have to understand some basics of the newsletter.
Design And Code A Newsletter: What are the components of a newsletter?
Before starting with Design And Code A Newsletter. You should divide a Newsletter into 3 parts, Header, Body and footer. A header should have either a Company logo or company logo along with a short menu on top.
Now Comes Body, in this part, you can show your content in a visually appealing manner so that your client will be tempted enough to click. For that, you can create an interactive gif or can place short snippets of your products/Posts that you want to promote.
At the end footer, the footer should be simple with just a company’s social media icons or a short menu with a disclaimer about how to unsubscribe.
Step 2: What are the dimensions of a newsletter in photoshop?
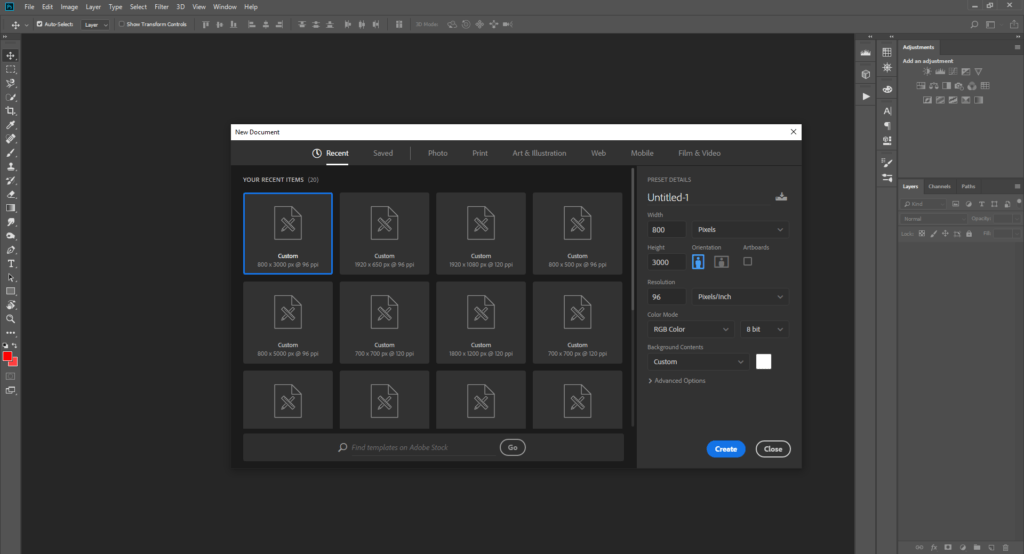
Now you all set up with Header, footer and body content in mind. Open your Photoshop and create a new file. As a standard measure, a newsletter should be no more than 800px and Less than 600px. Let’s create this newsletter with 800px width as most screens and phones run on full HD display with 1920 by 1080 pixels screen.
Height of the newsletter can vary according to your content. You can copy exact same dimensions as shown in the picture below for the start.
Read Also : Basics Of Drawing : How Art Helps People
Step 3: Placing Header, footer & content
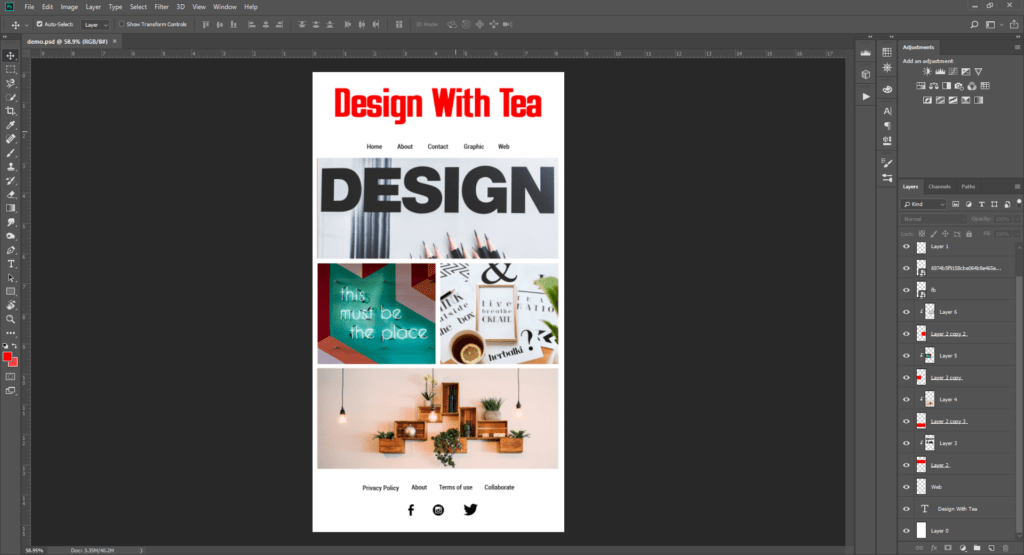
So you’ve made a black document in photoshop. Now start placing your header, footer & content on the document. Remember, keep it simple and try not to play with background colors & textures. If you are doing it the first time, you can just replace your details. Make it the same as shown in the image below if you want.
Step 4: Slicing A Newsletter For HTML Coding
Now you have created your newsletter. it’s time to convert it to HTML. It is relatively easy & you can do it without any prior HTML knowledge. Select the Slice tool and start slicing your newsletter as shown in the image below.
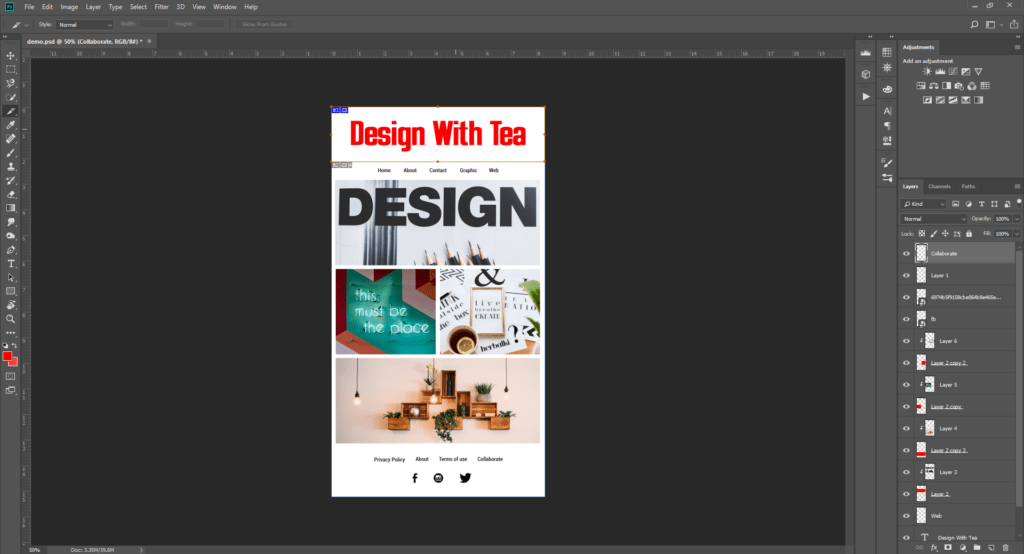
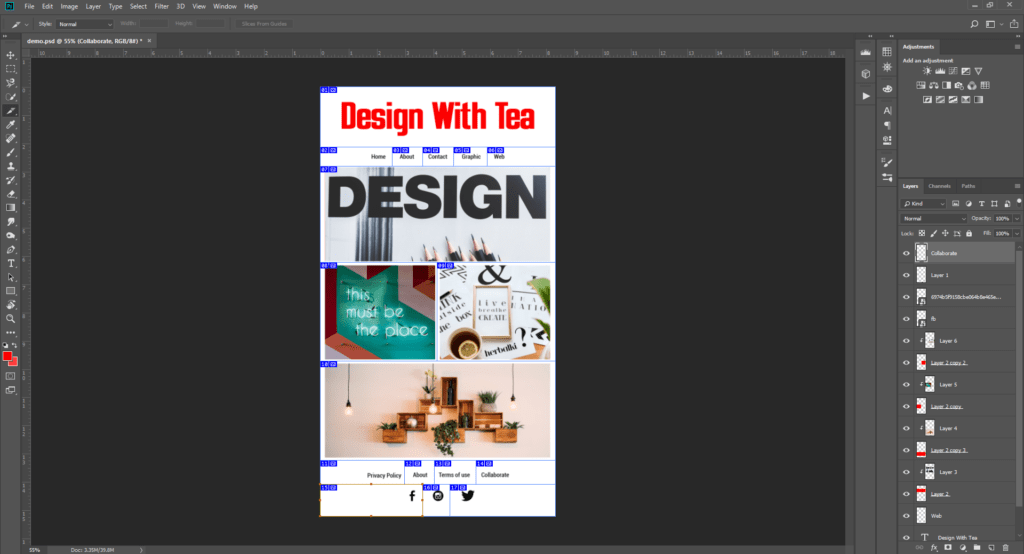
Ok now you have sliced newsletter, it’s time to put some links on images. So if anyone clicks, it will lead them directly to your website. After slicing the whole newsletter click slice select tool & double click to open a hyperlink dialogue box.
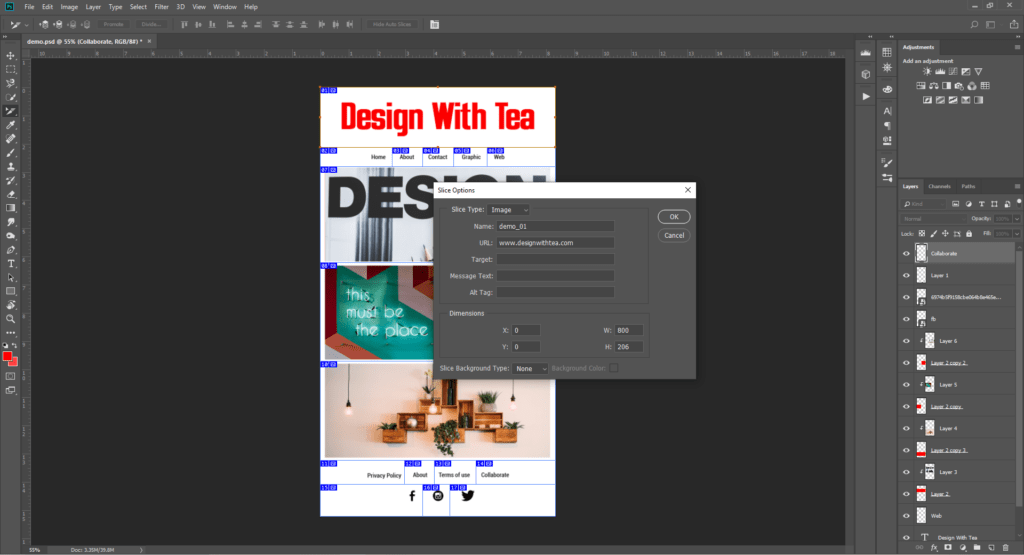
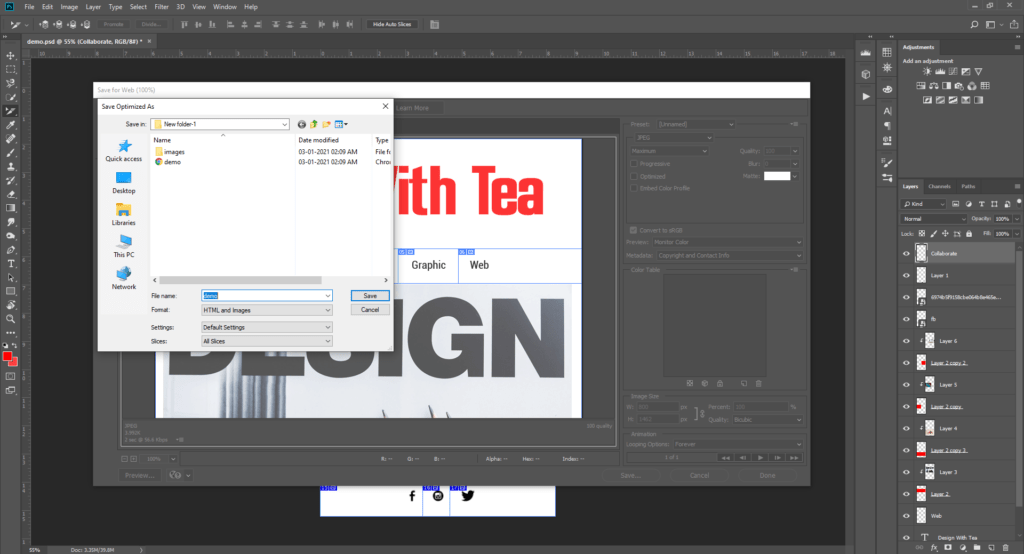
After putting all the links in the slices now save the file as HTML. For that, export your photoshop file & click on save for web
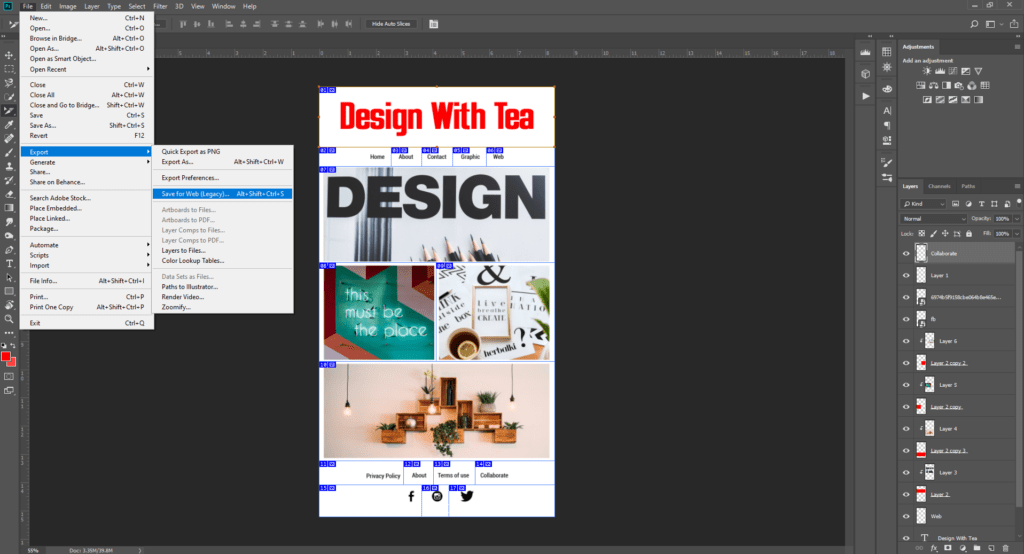
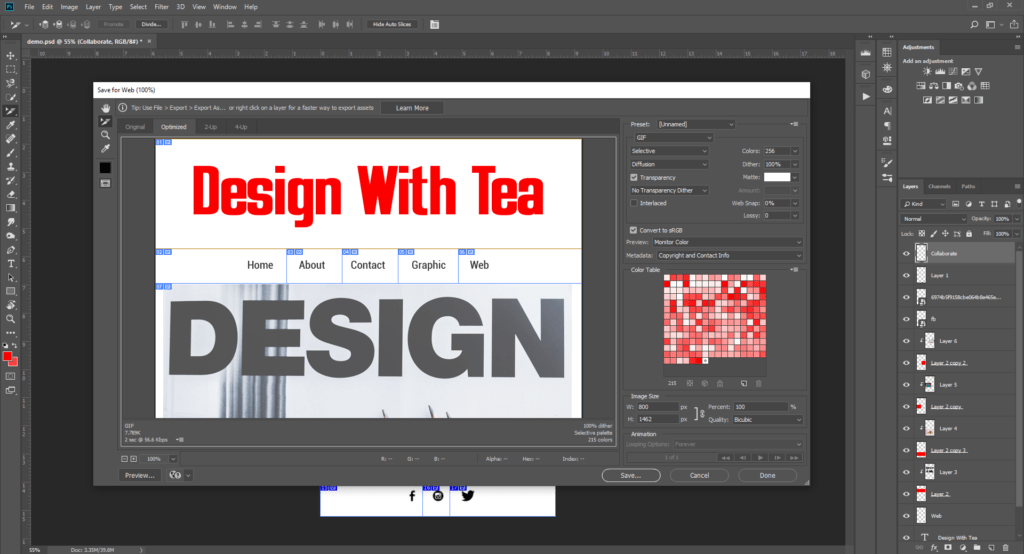
You can save as it but before that, you need to change some settings. Select JPEG format quality should be maximum & all three check box should be unchecked, now hit save. Upon hitting save you have to select HTML & Images. It should look like as it is in the image below.
Step 5: Edit Html file in Notepad & Make it ready for Final Stage
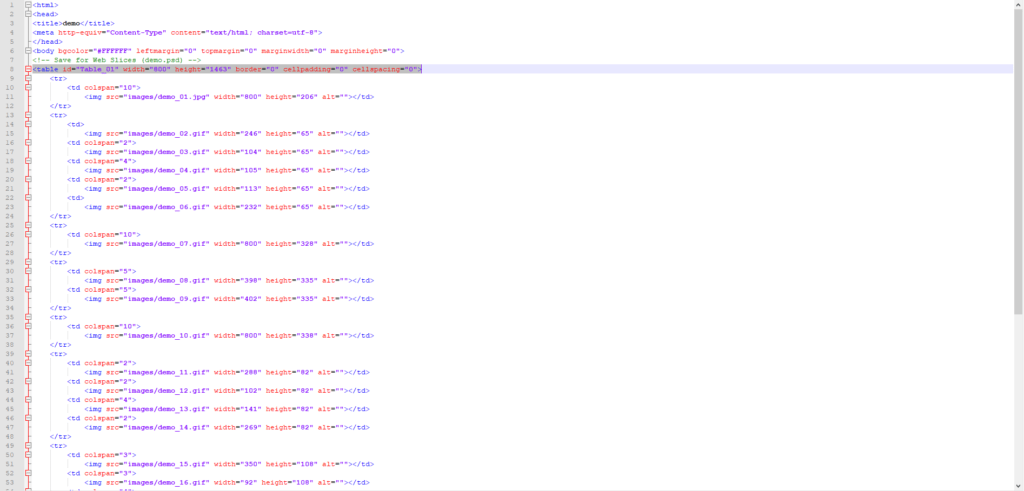
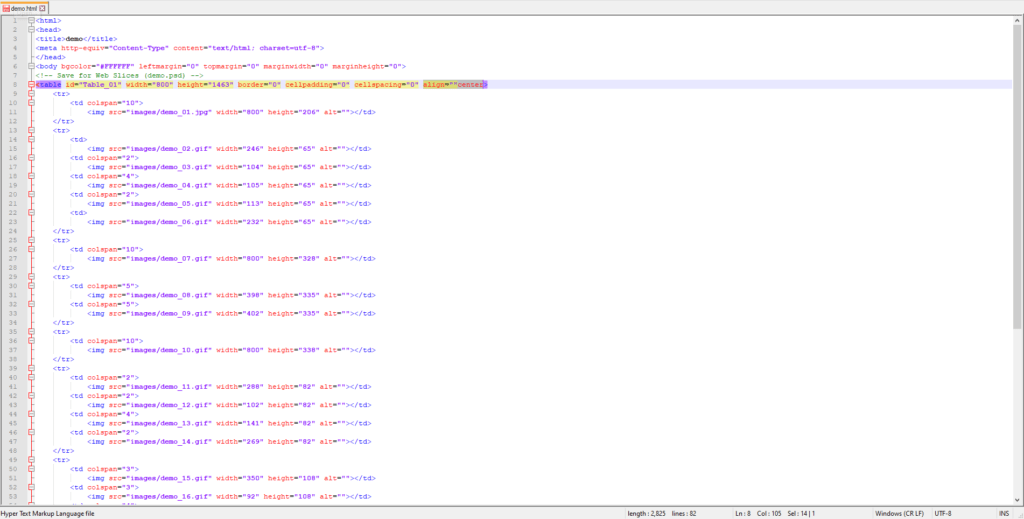
You have come all the way to the end but before sending a final newsletter you have to make sure that it will look good in mobile or mail. When you open that newsletter, it will look as not centrally aligned. For aligning that HTML file, open file with notepad or install notepad++. Though I prefer notepad++. Find the Main table and just add a simple code in the end. If you are getting confused at this point, just do it as it’s shown in the image below.
Final Step: How to send the newsletter to your audience?
After you are done with Design And Code A Newsletter. There are so many websites that let you send the newsletter to your audience but Mailchimp & Sendinblue are the most famous. I prefer Mailchimp especially as it gives you 2000 emails a month & it’s perfect for small business.
Sending newsletter in MailChimp require you to setup and newsletter subscription on your website.
What is newsletter subscription?
Newsletter subscription is a tool that can be embedded on your website that allows your customers to choose if they want to get emails from you. Whether it be daily, weekly or monthly.
Besides how to set up a MailChimp account is altogether a different thing that I will cover in another article.

